Want to learn how to scan sheet music into MuseScore? Then you need ScanScore! In this short guide, we’ll walk you through exactly how to scan sheet music into MuseScore using our software, ScanScore.
Here’s a short background on MuseScore. In 2002, Werner Schweer started a new hobby – developing music editing software. He created a piece of music software that could be used by composers and music educators everywhere- completely free. Werner saw the firm grip that large companies had on the music editing industry, as well as the high prices that they charged for their products. So Schweer and his partners went on to develop and present MuseScore to the world.
Branded as the “World’s Most Popular Notation Software,” MuseScore is unique in its balance of quality and accessibility. But what it does lack is a simple and accurate way to scan sheet music into an editable, digital form.
But we’ve got your back when it comes to scanning sheet music! ScanScore is the perfect companion to MuseScore.
You can scan your paper sheet music into MuseScore with ScanScore quickly. Keep reading to learn how to put these two pieces of software together!
Sheet Music Into MuseScore: Step By Step Instructions
1) Check your programs for updates
The first thing to do is to download the programs; MuseScore and Scanscore. If you’ve already done this, be sure to check both programs for any updates.
MuseScore is completely free! It is available on Windows, Mac, iPhone/iPad, Android, and Kindle Fire. In order to scan sheet music into Musecore with ScanScore, use Windows or Mac.
ScanScore is compatible with both Windows and Mac devices. Be sure to also download our free app on either the Google Play Store or the App Store.

Tech Tip: To use our app, scan the QR code on the desktop program. This code prevents people from stealing the software. After you’ve done this, you can import music from your device!
2) Preparing for Musescore: Scan the Sheet Music
Now that you have both programs, you’re ready to scan your sheet music. Open up ScanScore. Next, you’ll be asked how you want to scan in your music. Here are the options:
- Scanner – This option accesses your actual scanner. A direct image from a scanner usually provides the best results when it comes to note accuracy.
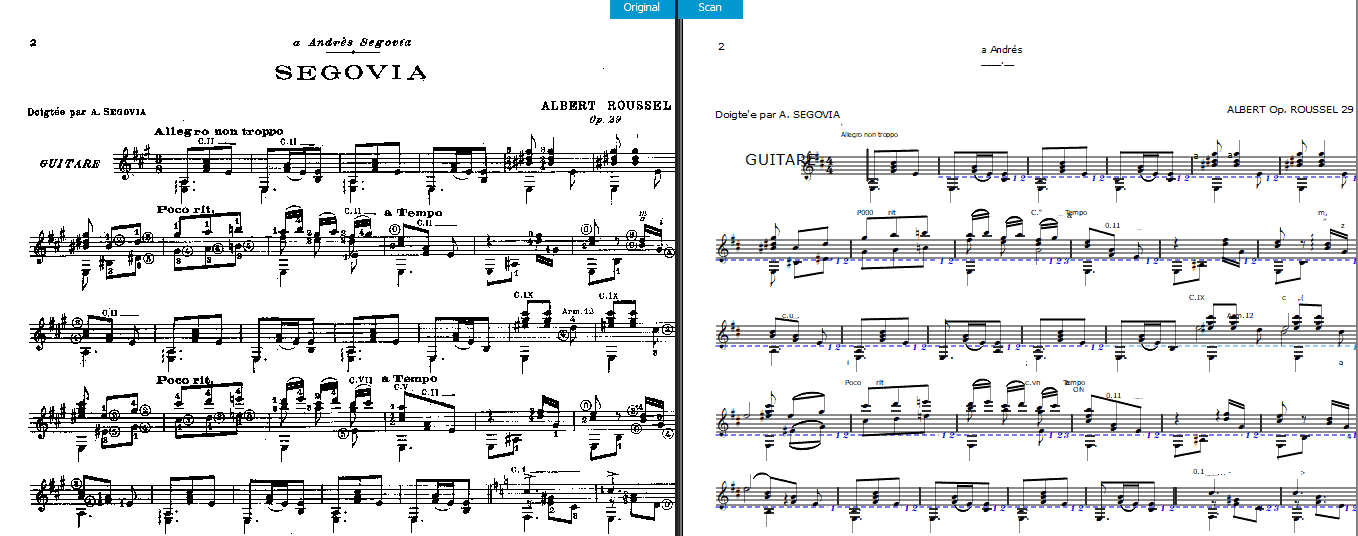
- Import from file – You can also import a PDF or image file type (JPEG, PNG, etc). If the quality of the image is good, this method of importing can also be very effective. But if you choose a low-quality PDF, you might be seeing a lot of blue lines like those in the score below.
Poor Roussel would be turning over in his grave with one glance at this score. As you can see, the ink in the original pdf wasn’t very clear, so we ended up with a digitized score in the wrong time signature. ScanScore is almost music magic, but we have to remember: quality imports are key. Start with the highest resolution possible. Then, you won’t have to spend as much time editing later!
- Scan with the app – You can also take a picture using our mobile app. But be careful; make sure you capture the best image that you can. A picture with poor-resolution will result in an inaccurate digital copy.
Pro-tip: To get a clear image, make sure that the sheet music has even lighting (natural light is great). Also, be sure that the image is taken at a parallel angle to the score. Don’t try to take pictures of scores on uneven surfaces such as on your bed or a couch- It’s time to make the move to the flat kitchen table or to your office desk!
3) Proof for mistakes
ScanScore is not only great for scanning. Did you know that you can use it to edit, too?
After your image is scanned, you’ll get a side-by-side view of the original and digital versions This allows for quick and easy comparison. You can now proof your digital version for any scanning errors!

ScanScore helps you out here. It catches mistakes and highlighting them in blue and purple so that it’s easy for you to see. Purple denotes an incomplete measure, and blue denotes a measure with too many items. When you find a mistake, simply use the toolbar or the arrow keys to fix it. We suggest, for final proofing, that you use the MIDI playback option to listen back to your score.
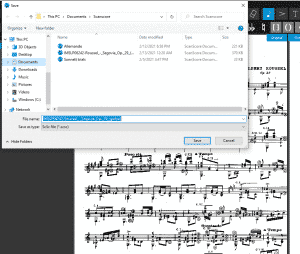
Pro-tip: To protect your work as you go, remember to save your file regularly. To do this, just go to “File” in the left-hand corner of the toolbar, and click “Save as”.
4) Export to a MusicXML file
Once you’ve made your corrections, it’s time to export the file into a MusicXML. This file type is the standard used in most notation programs like MuseScore.
To export, click “File” then “Export to MusicXML”. Next, select where you would like to save it. We recommend saving all your MusicXML files in one place so that you can easily find them again.
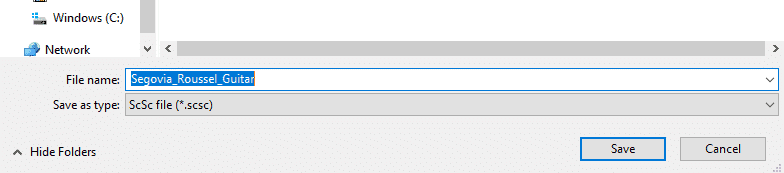
Pro-tip: Save your file under a name that describes the work so it is easy to remember. I suggest the following format ” piece_composer_part.” Example:
5) MuseScore Import
It’s now time to import the sheet music into MuseScore. This last step is simple!
Open up MuseScore. Go to the “File” menu and select “Open in MuseScore.” Then, find your labeled MusicXML file, and select it to open it.
After a brief moment, the file will appear in MuseScore’s program. Congrats! You have now successfully scanned music into MuseScore using ScanScore.
ScanScore Pro: You can use ScanScore with other notation programs too! Just select the file, and right-click. Now you will see an “Open with …” option. For more information about using ScanScore, please check out our introductory video here.
FAQ’S About our Music Scanning Software
Is ScanScore’s music scanning software able to read all sheet music? –
Yes! If you’re using modern Western notation then ScanScore can read it, no problem. And, ScanScore actually has three options for reading different types of scores.
ScanScore Melody is the most affordable and can be used to read scores with one line.
ScanScore Ensemble allows you can scan up to four staves per system – It’s great for small groups and ensembles!
ScanScore Professional is the more expensive option, however, it can handle large full scores (with a maximum of 32 staves vertically)!
Can’t I just use ScanScore to edit all my sheet music?
Yes and no. You can use ScanScore to make minor corrections to sheet music. If you are looking to change features of the layout of the score, such as how many measures per line, then you’ll need a notation software like MuseScore. ScanScore is best used with specialized editing software once your pieces are digitized.
Conclusion
That’s a wrap! Well, not quite. Let’s review the simple steps one more time. Remembering these 5 easy steps will help you scan music into MuseScore using ScanScore. If you need additional help, please go to ScanScore Support.
Here’s a quick review of the steps we’ve covered in this post:
- Download/ Update your programs
- Scan/Import the sheet music
- Proof it for mistakes
- Export it to a MusicXML file
- Import the music into MuseScore
See? Scanning music into MuseScore is easy, with a little help from ScanScore! Have fun and happy practicing!

Are there any pieces of notation software that ScanScore is incompatible with?