Many users assume that scanning errors happen during the recognition process.
But the truth is:
👉 Most errors occur before scanning even begins.
When working with ScanScore, everything starts with the quality of your input. Whether you import a PDF, take a photo, or scan a printed score, the software must first process an image.
This is where the Prescan Window comes in.
Used correctly, it can dramatically improve your results—and save you a lot of time later.
🧠 Why the Prescan Window Prevents Errors
Before ScanScore analyzes any notation, it works with a visual representation of your music.
That means:
- Poor image quality → poor recognition
- Skewed pages → broken staff detection
- Shadows and noise → incorrect symbols
👉 In fact, many scanning problems originate at this early stage
This is why the Prescan step is not optional—it’s essential.
🖼️ Prescan Window
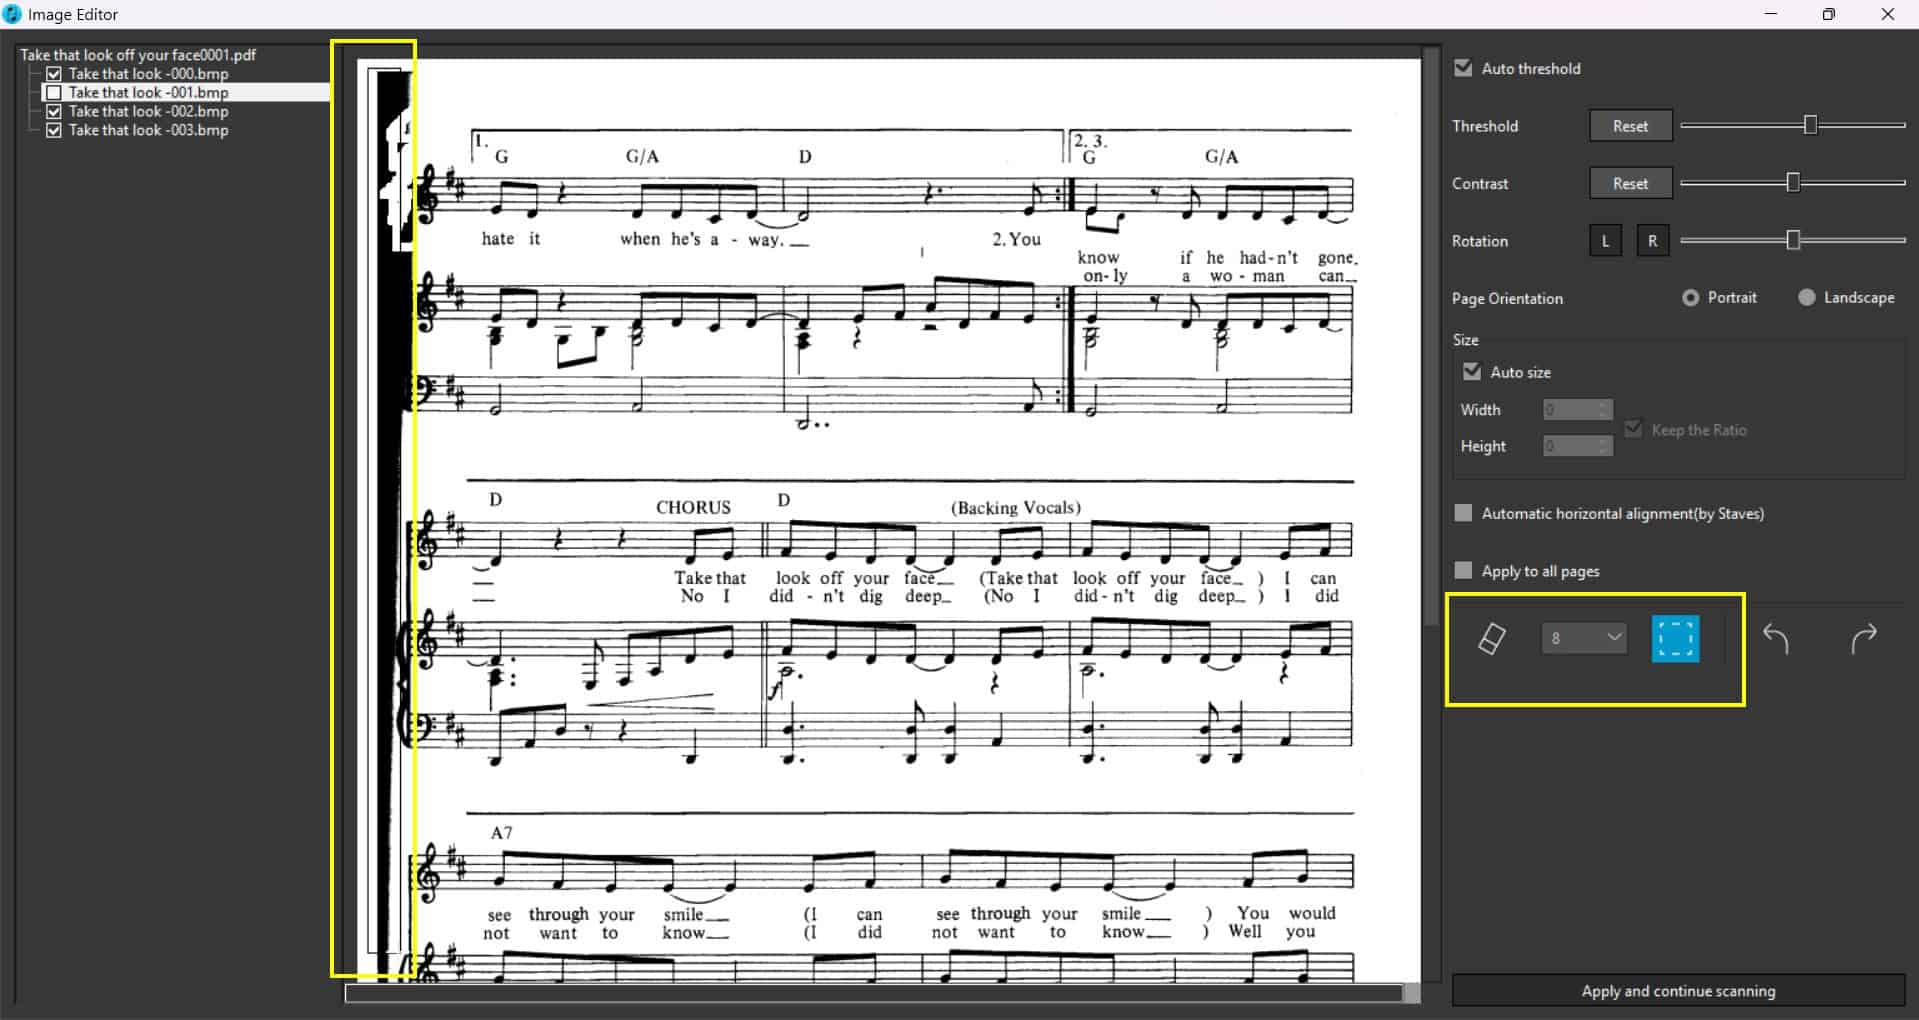
- Rotation
- Contrast
- Threshold
- Eraser
⚙️ The Prescan Window – Tools Explained
The Prescan Window appears after every import and allows you to prepare your sheet music before recognition starts.
🔄 1. Rotation (Straightening the Page)
One of the most common issues is a slightly rotated or tilted page.
Why this matters:
- ScanScore relies on horizontal staff lines
- Even small angles can cause recognition errors
👉 Best practice:
- Always check that staff lines are perfectly horizontal
- Rotate the page until everything looks straight
🎚️ 2. Threshold (Brightness Adjustment)
Threshold controls how light or dark the image appears.
Use it to:
- brighten dark scans
- enhance faint notation
⚠️ Be careful:
- Too high → noteheads may disappear
- Too low → background noise increases
👉 Recommended approach:
- Adjust gradually
- Stop as soon as notes are clearly visible
🎛️ 3. Contrast
Contrast increases the difference between dark and light areas.
This helps:
- separate notes from the background
- improve readability of faded prints
👉 Workflow:
- Increase slowly
- Stop when the image looks crisp
- Avoid over-enhancing
🧽 4. Eraser Tool
One of the most powerful—and underrated—features.
Use it to remove:
- pencil annotations
- fingerprints
- shadows
- smudges
👉 Important:
Only remove elements that are NOT part of the music.
Never erase:
- noteheads
- stems
- clefs
- barlines
🖼️ Image Briefing 2
Before/After comparison
- raw scan vs optimized prescan
🚫 The 5 Most Common Prescan Mistakes
❌ 1. Skewed Pages
→ leads to completely incorrect recognition
❌ 2. Over-editing the Image
→ removes important musical details
❌ 3. Ignoring Shadows
→ scanner misinterprets visual artifacts
❌ 4. Incorrect Page Scaling
→ distorted notation and spacing
❌ 5. “I’ll fix it later”
→ errors multiply throughout the workflow
📱 Scanner vs Smartphone – Which Is Better?
Scanner:
✔ highest image quality
✔ consistent lighting
Smartphone:
✔ flexible and convenient
✔ fast capture
👉 Important when using a phone:
- keep the camera parallel to the page
- ensure good lighting
- avoid shadows
👉 If the image is poor:
👉 retake the photo instead of over-correcting it
🧭 The Perfect Prescan Workflow (Step-by-Step)
Step 1: Import your file
- PDF, image, or scan
Step 2: Check rotation
- ensure staff lines are horizontal
Step 3: Adjust threshold & contrast
- clear notes
- clean background
Step 4: Remove artifacts
- use the eraser tool
Step 5: Start scanning
👉 Result:
- fewer recognition errors
- less manual correction needed
🧠 Pro Tips for Better Results
- Less is more when adjusting settings
- Always review each page briefly
- Retake bad images instead of fixing them
- A few seconds in Prescan can save hours later
✅ Conclusion
The Prescan step is the foundation of accurate sheet music scanning.
It determines whether your scan will be:
- clean or error-prone
- efficient or time-consuming
👉 Better preparation always leads to better results.
If you want reliable MusicXML exports and minimal corrections,
start by mastering the Prescan workflow.