Do you have dozens upon dozens of PDFs from IMSLP and other sources?
Is your music chaotically scanned into your computer, and you’re just not satisfied with the outcome?
Are you an arranger looking for a faster way to digitize your music?
Are you tired of punching in music, painstakingly, note-by-note?
If you answered yes to any of these questions, we can help you out. Today, I am going to be teaching you how to convert PDF to MIDI with ScanScore.
Sure there are sources that help you scan PDF to MIDI online. But these free or low-cost methods often lead the user to a result that is less than ideal and is riddled with mistakes. There are PDF to MIDI apps, but once again, the research in OMR and quality just isn’t there. And that’s why you need ScanScore.
ScanScore is more than just a PDF to MIDI converter. It is also a scanner, editor, and MIDI music player.
So don’t sweat it. It’s easy to convert PDF to MIDI, with ScanScore by your side. Let me show you how. But first, here’s a little bit more about ScanScore’s products.
ScanScore: 3 Great Software Options
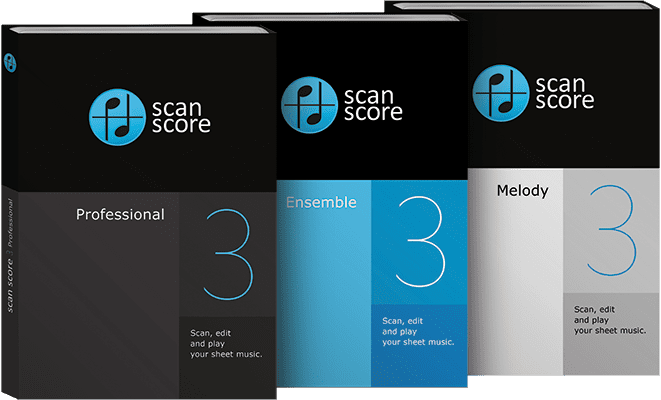
Meet ScanScore 2. ScanScore 2 is a program that can scan, edit, transpose, digitize, and export your music to musicXML’s. There are three options when it comes to ScanScore:
ScanScore Melody: This allows you to scan one-line pieces.
ScanScore Ensemble: Gives you up to 4-lines of scanning and digitizing.
ScanScore Professional: Offers unlimited staves and instruments.
ScanScore melody is a favorite among elementary music educators, who only usually need to digitize a single line of vocal music or music for the recorder. ScanScore ensemble is most often used by choral directors and those in string quartets. ScanScore professional is a favorite among arrangers and directors of large ensembles because there are no limitations. Now that you know what ScanScore is all about, you can pick out the product you need!
Pro-Tip: Don’t forget about our free app that compliments the software. It’s called ScanScore Capture, and you can find it on both the App store as well as the Google Play Store!
Step by Step Process
Step 1: The “PDF” part of PDF to MIDI
The first step is to pick out your PDF. Sounds simple, but it’s actually not! In order to accurately scan music, ScanScore needs a high-quality PDF. Let me show you an example.
Today, I decided to import the piece Etude 1 by Lukas Florczak. I downloaded it from IMSLP. Here is the quality of music that I chose:
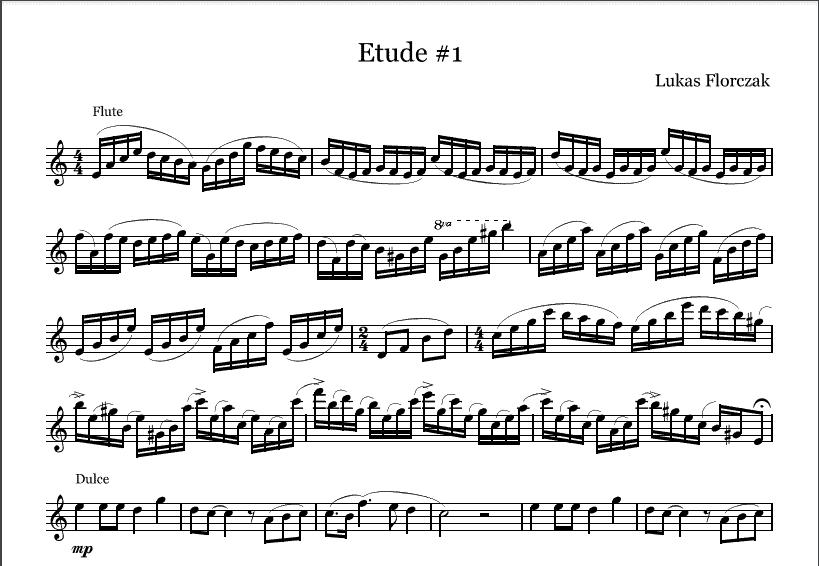
Notice how dark the ink is, and how it was created with notation software like Sibelius or notion. There are no coffee stains, light notes, or other unclear markings. When you are looking at your PDFs, make sure they are high-quality. They don’t have to be perfect, but the better they are, the less work you’ll have to do later. And who doesn’t want to save time?
Step 2: Importing
Before we get to importing, make sure you save your file in a place where you can find it! What I like to do is make a folder just for PDFs and ScanScore digitizations. I labeled the folder “ScanScore Scores”. After this, I save my piece in an easy-to-find way. You can choose whatever method works for you. I prefer “Piece_Composer_Instrument”, so my file was saved as “Etude1_Florczak_Flute”
Now that we are all organized, it’s time to start the import process. Go ahead and open up ScanScore on your computer. You’ll see the main buttons in the middle of the screen.

We’ll be using the second button, Import Image/ PDF file (s). You can also go to the lefthand side of the ScanScore screen, and choose this option from the dropdown. The third option in the file dropdown also says, Import Image/ PDF file(s). Either way works, it just all depends on your preference!
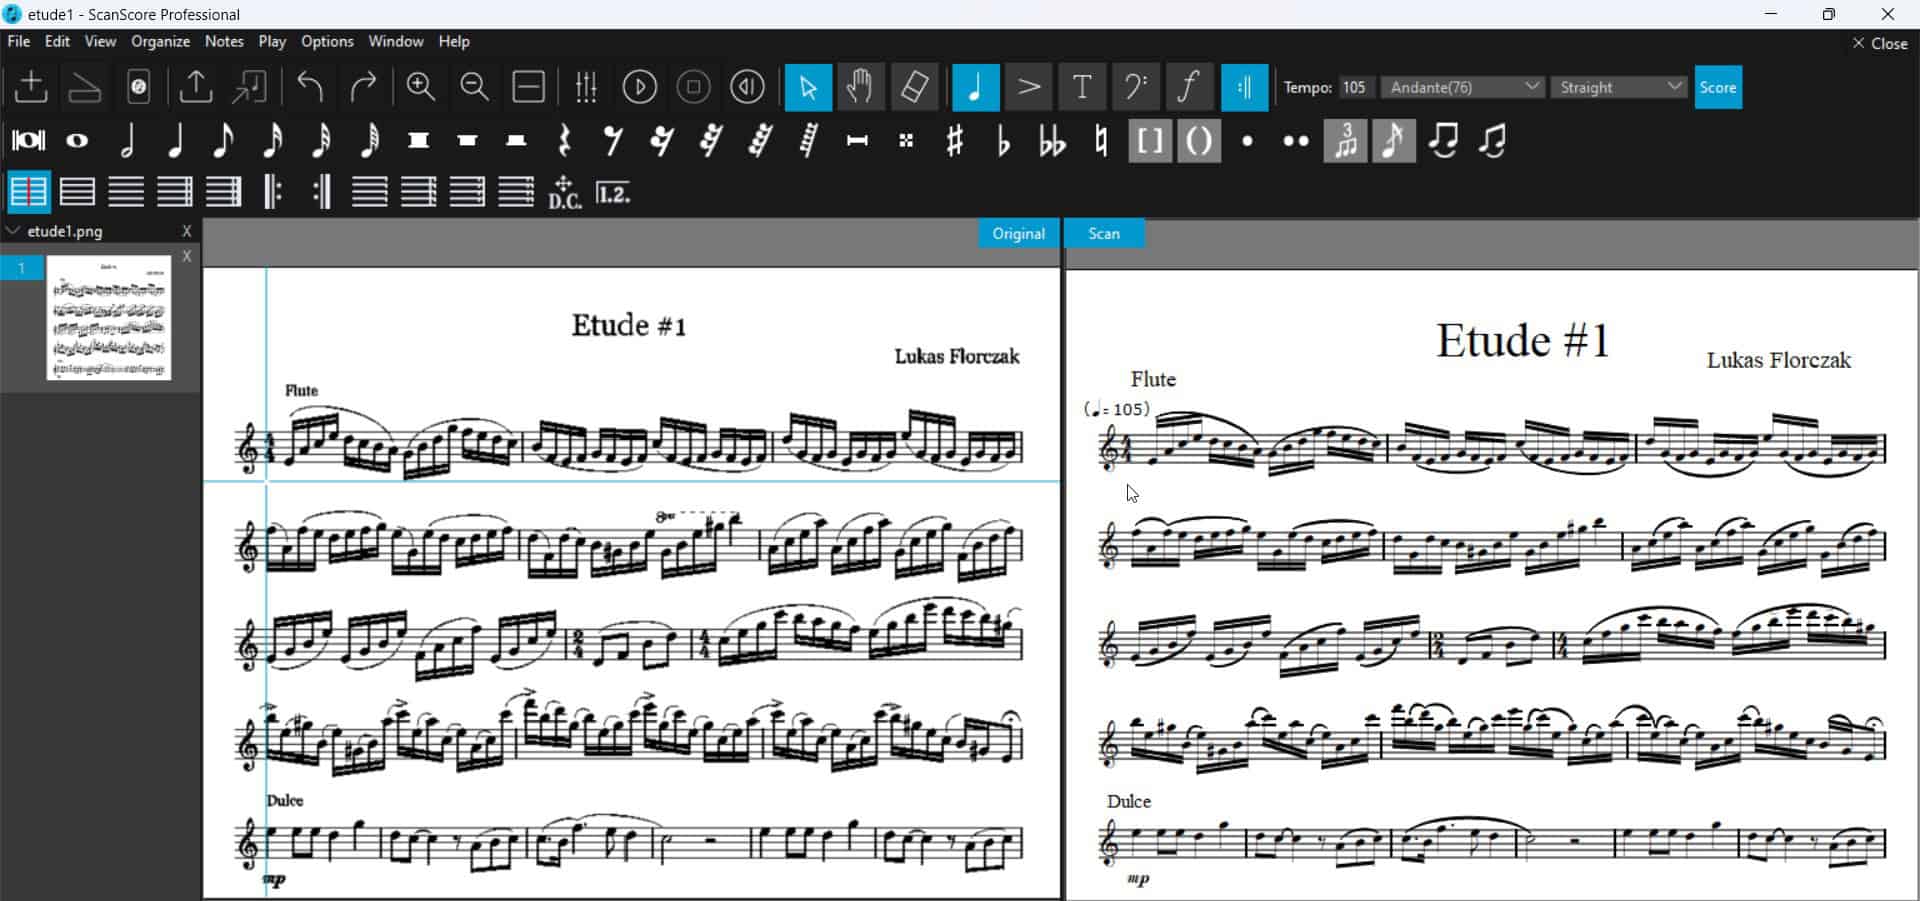
In a matter of seconds, your score will be imported and digitized. On the left is the original, and on the right is the new version.
Step 3: Editing
Because no OMR is perfect, we need to enlist the help of our editing tools. While you might be thinking “Ugh, there might be mistakes?” I want to remind you of how much time scanning software will save you in the long run. Importing an etude in ScanScore saved me inputting over 100 notes. So, how do we edit?
What looks like happened is a common OMR error. ScanScore missed the time signature changes, which caused the blue error lines to show up. So, let’s check out the toolbar.
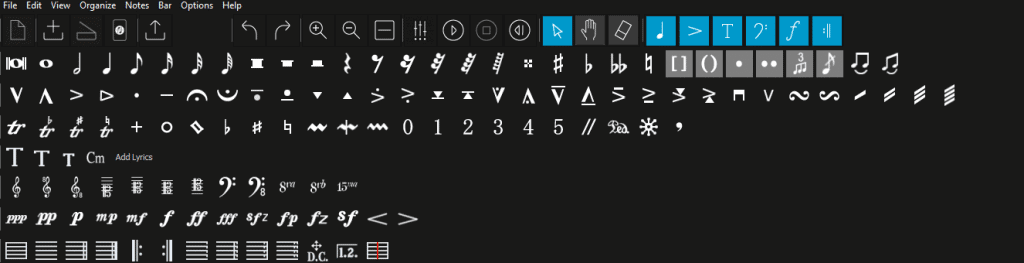
To edit inside of ScanScore, use the intuitive icons. With each icon you click, a new sub-toolbar will show up. Here is an example of some of the toolbars open:
You can also edit pitches by either drawing a box around the item (and the arrow keys) or by using the mouse and your arrow keys. The same goes for adjusting rhythms. Just drag and click, and select the rhythmic value you need to change it to.
You’re almost done! All that is left to do is to playback and save!
Step 4: Playback and Save
The playback tools that you can see above are really simple to use. The order of the buttons is: Play, stop and rewind. I love the MIDI playback features in ScanScore because it helps me edit the score for mistakes without having to scrutinize the score with my glasses on. After you’re done, remember to hit File> Save.
ScanScore’s Mixer: A Helpful Extra
Did you know that ScanScore has an extra? I recently learned that you can change the MIDI sound that plays back, too! ScanScore 1 used to have only the option of playing back with a MIDI piano sound. But ScanScore 2’s sounds are much more expansive. Here’s how to use the mixer and how to change the MIDI sound type:
Simply go to the toolbar, and click on the upper left button that has the cartoon mixer. Click on it, and you should see this open up:
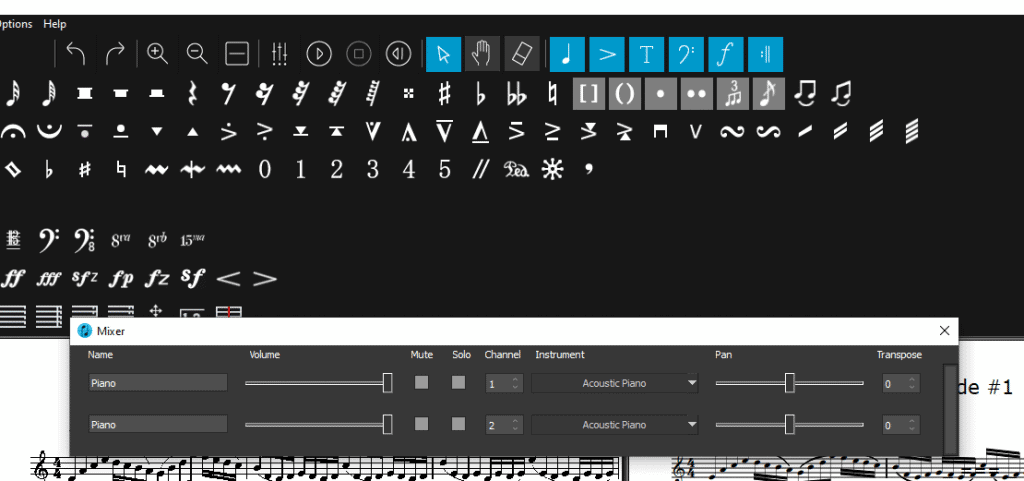
Now you can pan, transpose, and change your instrument to one of the following:
- Woodwinds
- Brass
- Guitars
- Strings
- Percussion
- Singers
- Synth lead
- Synth FX
- Synth Pad
- Or Exotic
You can even add more than one instrument, as well as mute or solo different lines. I just discovered this tool, and I have to say, I am in love with it!
PDF to MIDI: Conclusion
Here are the steps to convert a PDF to MIDI one more time:
Step 1: The “PDF” part of PDF to MIDI
Choose and save a high-quality PDF of the sheet music you would like to digitize.
Step 2: Importing
Find and import the PDF document.
Step 3: Editing
Compare the two versions of the music. Use the toolbar to correct any mistakes!
Step 4: Playback and Save
Use the MIDI playback to hear the score. Congrats! You have now digitized a score, which you can now hear in MIDI piano form.
Thanks for stopping by the ScanScore blog. Come back again soon for more tips and tricks on how to make digitizing easier.
What you have to say is important to us. So, whether you have questions, article requests, or compliments, be sure to comment down below! Until next time.
Music quote of the week:
“I produce music as an apple tree produces apples.”
–Camille Saint-Saens


That is a really good tip especially to those new
to the blogosphere.
Brief but very accurate information? Thank you for sharing this one.
A must read article!
Where can I find more information on ScanScore’s mixer??